

How To Take Apart Shark’s Navigator Lift Away Vacuum Cleaner
Would you like to know how to take apart a Shark Navigator Lift Away?
Let me show you the easiest way to disassemble your Shark Navigator, where to buy replacement parts and most importantly all the tools you’ll need for the job.
This guide will work for most Navigator Lift Away’s, but the model I’m demonstrating with is the NV352.
It should be similar for most of the other 3 series Navigators including the NV355, NV356e, NV351, NV360, etc.
This video will be useful for you if you need to replace the brush bar, brush bar motor, belt, on/off switch, main motor, hoses and filters.
Video Guide: How To Take Apart Shark Navigator Lift Away NV352 Step-By-Step
Parts You May Need
These replacement parts should fit your NV352 or other 3 series Shark Navigator Lift Away vacuums, but please check before ordering.
- Small Front Wheels
- Brush Bar Belt
- Handle With Hose
- Small Nozzle Hose
- Filter Pack – Pre-Filter & HEPA
- Brush Roll Bar
- Dust Bin
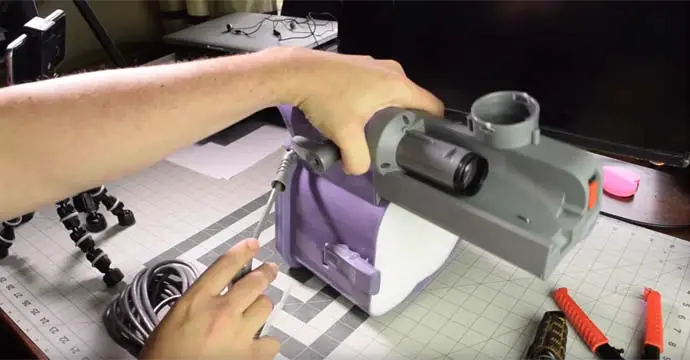
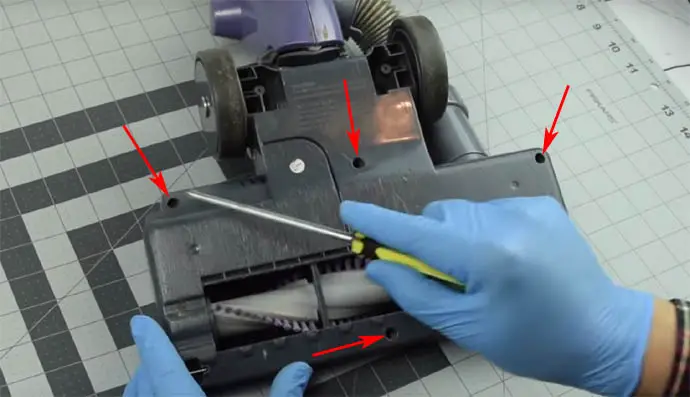
Step 1 – Removing Base Plate
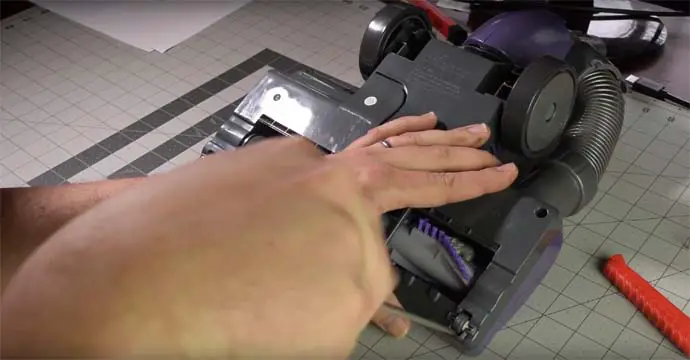
In order to get at the brush bar and the brush motor you need to take off the base plate.
There are eight screws to remove altogether. Note that two of the screws are under the little front wheels and two more are between the large back wheels.
You’ll need a Shark vacuum screwdriver or special star shaped security bit for this.
The best ones for the task are the Lexivon 13 Piece Torx Bit set and the T-Handle Hex bit holder.
You could also use a bit holding screwdriver set if you have one already.
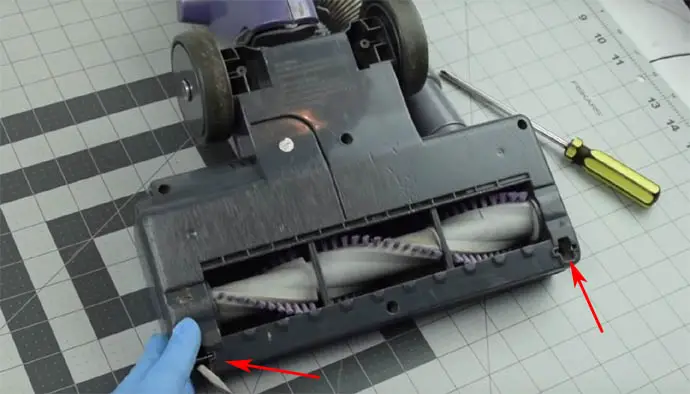
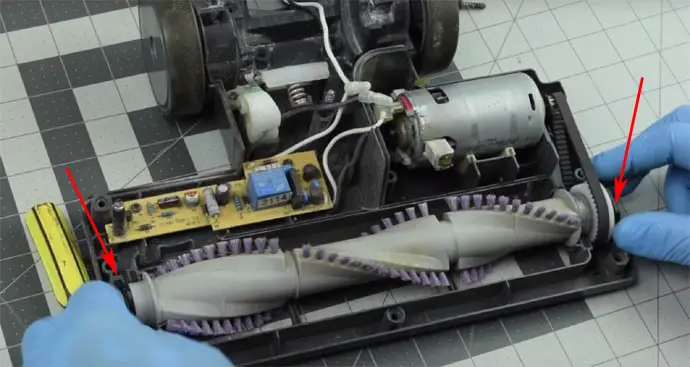
At this stage you should now have access to the brush bar, belt, small hose, circuit board and the brush bar motor.
The brush bard lifts out easily and the belt with unhook from the motor.
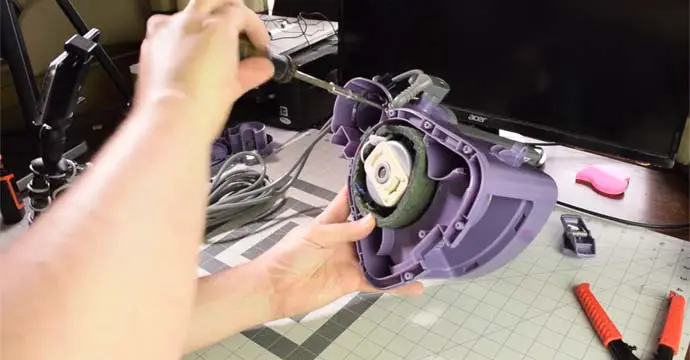
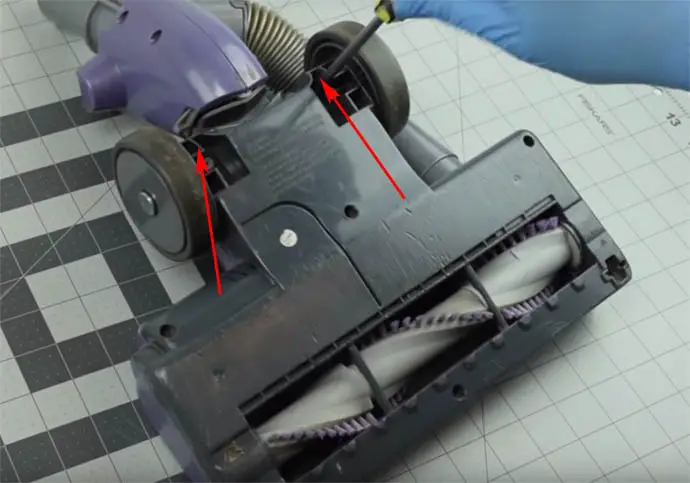
Step 2 – Removing Brush Roll Motor
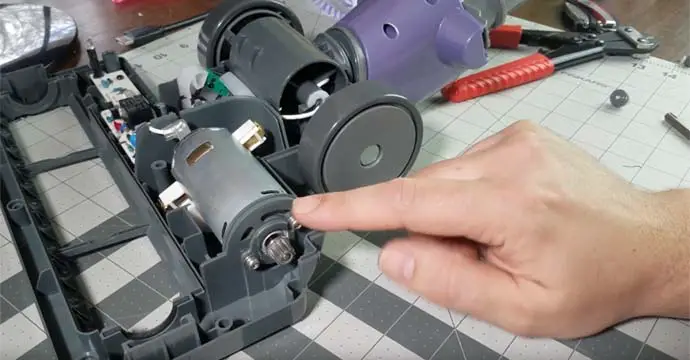
The newer models have two screws at the side which need taken out whereas the older models don’t and the motor can just be lifted out without too much trouble.
Once you have the motor lifted out, you’ll need a pair of needle nose pliers to remove the circuit board leads from the motor contacts.
Step 3 – Removing The Circuit Board
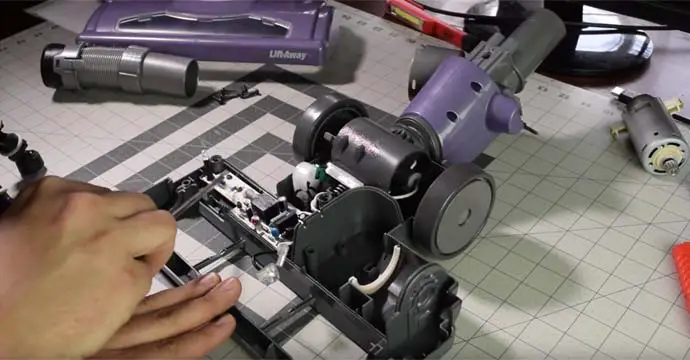
The circuit board is held in place with two screws. If you are replacing the brush motor for any reason, you might as well replace the circuit board as it could be partly responsible for any faults that are occurring.
Beside the circuit board you’ll also find the handle engagement switch which only activates the brush bar when the handle is in the correct position.
At this stage you should be able to remove the whole swivel unit from the base plate.
Step 4 – Disassembling The Motor Housing Unit
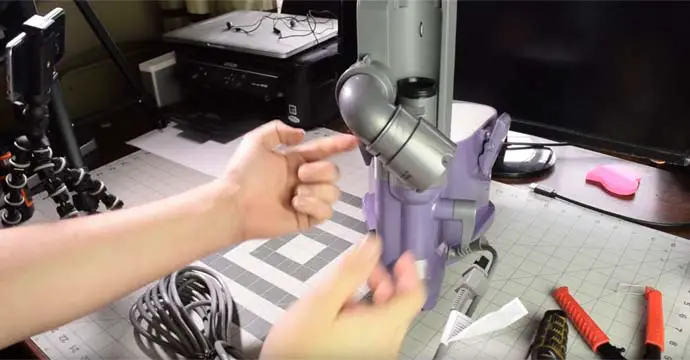
You can quickly and easily remove the swivelling elbow shaped pipe by getting a good grip on it and pulling towards you.
Step 5 – Removing The Side Latches
The next stage is to remove the side latches which is easy enough to do, but you need to remove the Hepa filter and cover at the front first.
Lay the motor housing on the front and push down on the dowel pins holding the latches in place.
It requires a certain amount of pressure with a center hole punch to disengage the pins, but not enough to require a hammer.
After you have the latches removed, take out the top filter as well.
Step 6 – Remove All Screws From Motor Housing
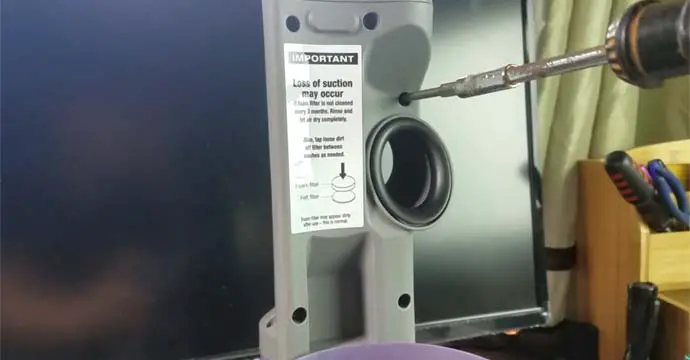
Remove all the screws from the front plate. Note, there is a screw hidden behind the ‘loss of suction’ sticker.
There should six screws altogether.
Also remove two screws from around the back of the handle holder.
Step 7 – Remove Screws From Bottom
There should be ten screws in the base that all need taken out. This should allow you to release the motor from the housing.
Top Tip: If you are disassembling your Shark Navigator Lift Away for the first time, you should video yourself doing it.
This will help you when it comes to reassembling later as you will be able to watch back and see how you took each bit apart if you forget.
For more guides on DIY vacuum repair and other home and kitchen appliances, checkout Show Home Style.
How To Change The Belt On A Shark Navigator Professional Vacuum
Would you like step-by-step instructions on how to replace the belt on your Shark Navigator Lift Away vacuum?
Follow our easy step-by-step guide below to quickly change the belt on your Shark Navigator or watch the video.
Before you start taking your vacuum apart, make sure you have a new belt ready to install.
The best place I’ve found for buying a replacement belt is Amazon.com.
You’ll also need these tools to open a shark vacuum. Here’s a list of exactly what you need before you start:
Step 1: Remove Screws At Back
The first step is to remove these four screws on the bottom of the cleaning head. On older models these screws are Philips, however on newer models they are Tonsiki.
You will find both in this screwdriver set.
Step 2: Remove Screws Behind Front Wheels
The next step is to remove another two screws from under the front wheels. The two small wheels will pop out using a flat-head screwdriver as shown above.
You may notice that our image doesn’t have any front wheels. They have already broken off at some stage, but the little axle pins are still there.
These need to be removed before you can access the screws underneath.
Step 3: Remove Last Two Screws
There are another two screws hidden in between the main wheels. Remove these screws using the screwdriver.
Step 4: Lift Off The Cover
After removing all eight screws, the plastic base should lift off quite easily.
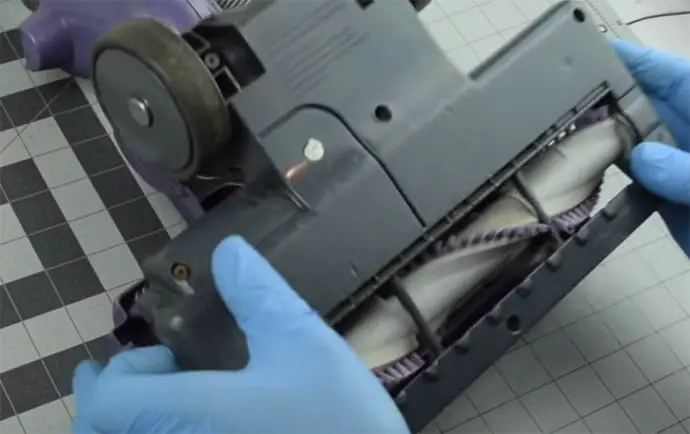
Step 5: Lift Out Roller Brush/Beater Bar And Change Belt
After you turn over the plastic cover you will see the motor, roller and belt.
If you carefully lift the roller out using the sides, the belt will be easy to access and change.
Step-By-Step Video Guide